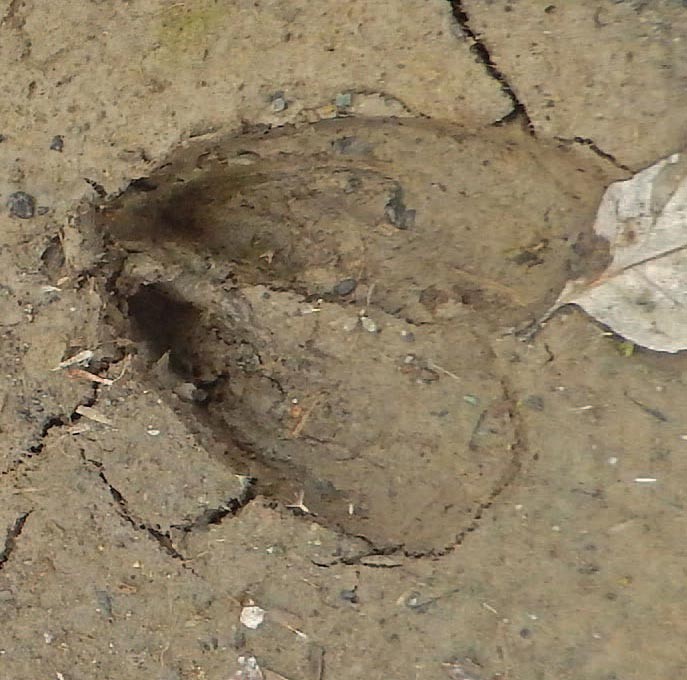
During my wanders through the woods, I’m always looking for animal tracks and other signs. The bare ground of spring provides a broad canvas for tracks, and good conditions for creating plaster molds. Although fine soil and silt offer the cleanest tracks, muddy conditions – common before the trees leaf out – are best for experimenting with plaster casting.
Casting offers a different way to appreciate tracking, providing an opportunity to feel the shape of an animal’s pads, hooves, and claws. Casts can also reveal details that can be hard to see in the field, for example, moose or deer dewclaws, the furry negative space of a red fox foot, webbing in an otter track, and subtle differences in the toes and nails of different species. Casting doesn’t require special equipment, and it can be a fun activity to share with friends and family members of any age.
If you’d like to see a demonstration of this process, there are numerous helpful videos easily found online.
Materials list
1. Plaster of Paris, or – harder to find, but better – surgical or dental plaster, which result in a stronger, more detailed cast. Keep dry until ready to use.
2. Quart- or gallon-size container for mixing the plaster.
3. Broad putty knife or a paint stirrer. You can also use a stick, but a flat shape is easier for mixing the plaster and scraping it out of the container.
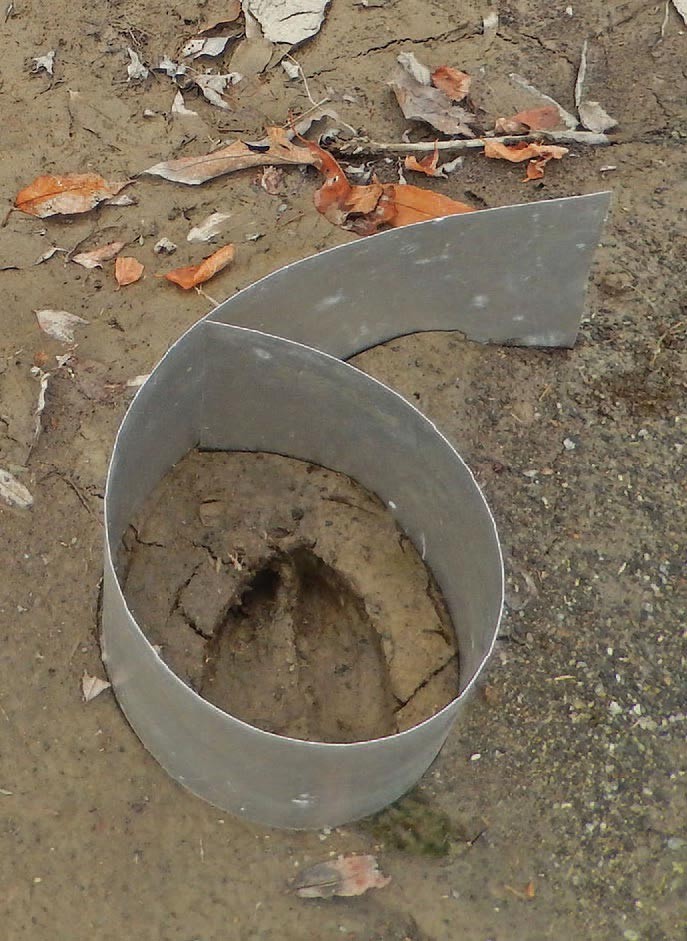
4. Molds to contain the mixed plaster in and around the track. These should be at least 2 inches deep and at least ½ inch wider than the track you want to cast. You may want to bring a variety of sizes. I have used yogurt containers cut horizontally, plastic berry boxes with the bottoms cut out, and pieces of sheet metal, which have the advantage of fitting around larger tracks and are easy to push into the ground to keep the plaster contained.
5. At least a quart of water; a gallon is better unless you will have easy access to relatively clean water where you are looking for tracks.
Directions
1. The best place to find tracks to cast is in soft ground or mud. Once you find a track you want to cast, choose a mold that is larger than the track by at least ½ inch, because pressing the mold into the soil too close to the edge of the track can cause distortion.
2. Mix at least 2 cups of plaster, depending on the size and number of tracks you want to cast. I add water in small amounts until I create a loose pudding consistency. (Overly runny plaster may leak out under the bottom of the cast.) Pour plaster into the mold to at least 1½- to 2-inch thickness.
3. Holding your mixing utensil horizontally, gently tap the surface of the plaster for 30 seconds. This will push the plaster into the track’s crevices and help displace air pockets.
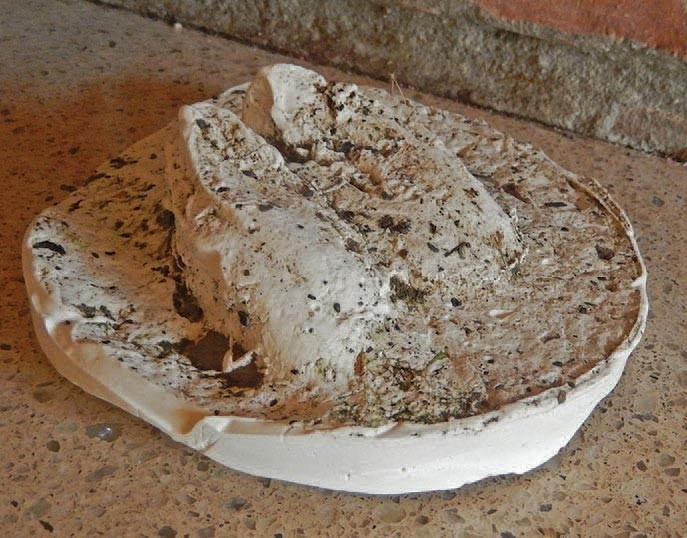
4. Wait. Plaster takes about 30 minutes to harden enough to lift. Once the plaster’s surface feels firm, gently lift and twist it out of the mold. Resist scraping soil away from the cast, as the plaster will still be soft and easy to damage.
5. Allow the cast time to cure – a full day is best. Then gently brush off the soil using a soft brush. (An old toothbrush is perfect for this.) Leaving some dirt is fine as it helps to create a visual contrast.