Surrounded by hardwood forest in northern Vermont, I process five cords of firewood annually for my family’s use. As gratifying as this work can be, I’ve often found myself wanting to do something with these trees other than burn them; something creative, yet useful. Last March, I set out to create a dough bowl from a cherry tree harvested from my woodlot.
I was inspired by the Scandinavian crafts tradition of finding ways to create tools and products from materials in the immediate environment, and also by an episode I’d seen of Roy Underhill’s long-running PBS show, “The Woodwright’s Shop.” In that episode, Underhill documented a project by renowned woodworker Peter Follansbee, in which he carved a piece of tulip poplar into a bowl. His seamless flow was mesmerizing, as he quickly wrangled a chunk of log and transformed it into a useful, beautiful object. Follansbee’s lesson on the program that day intrigued me; I liked the idea of making a bowl that would highlight wood’s beauty and texture, and of using only common hand tools in the process.
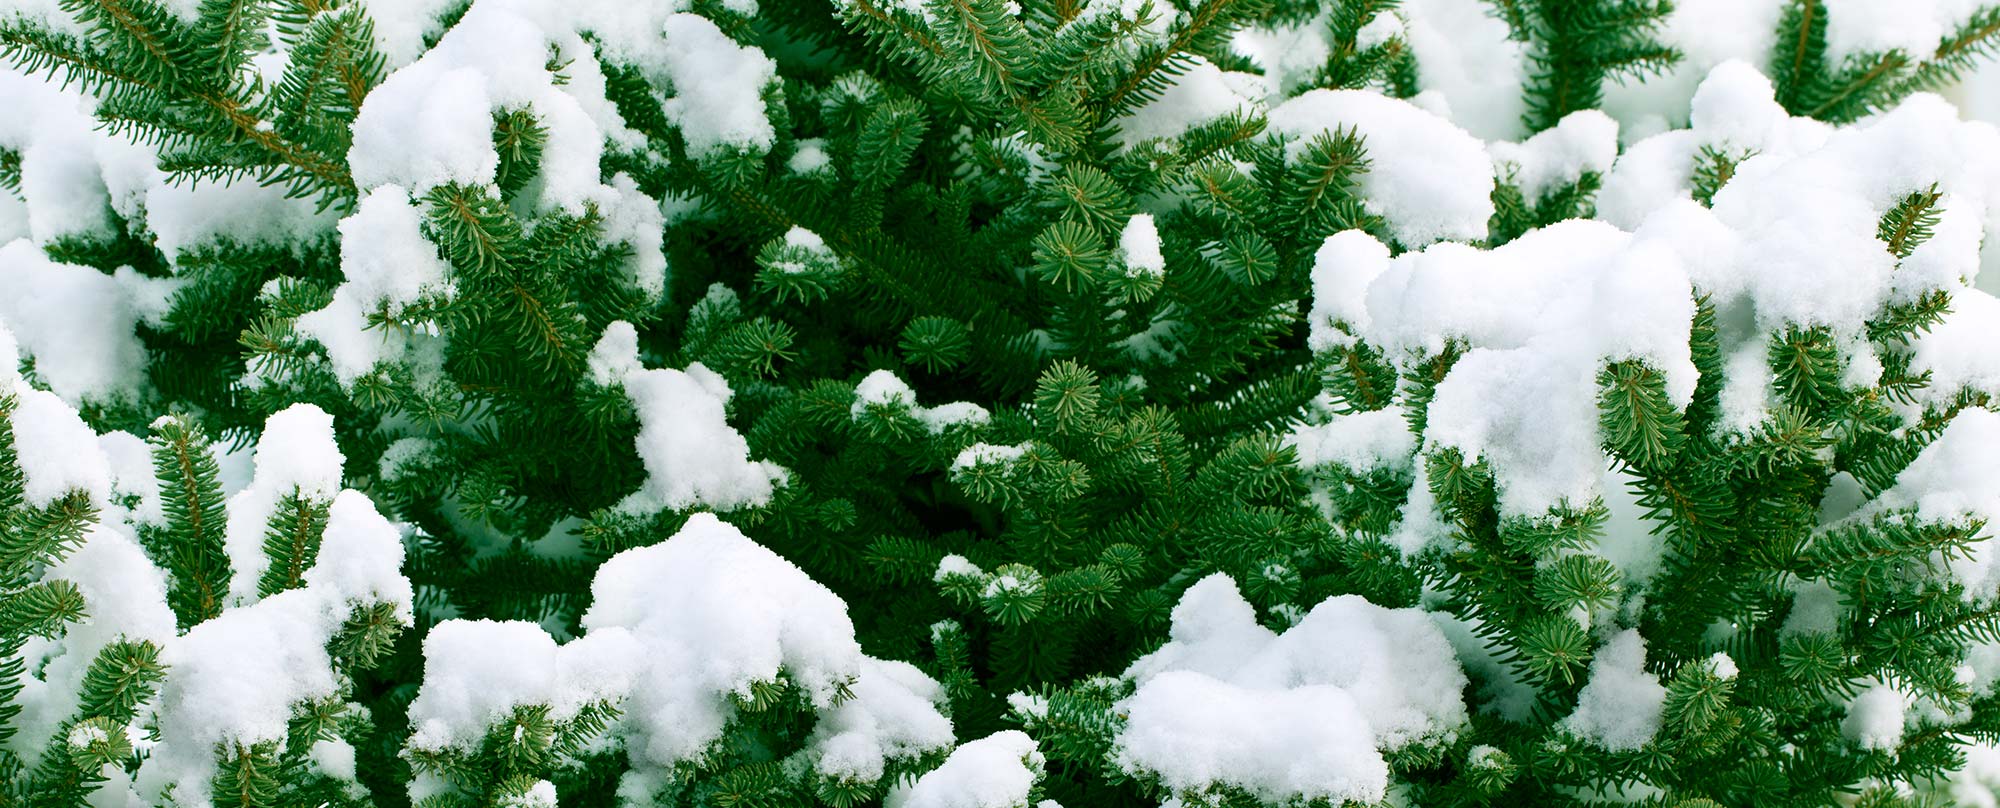
My first step was to select a healthy cherry tree that I was comfortable handling. Different trees have different densities, which dictate how easy they are to carve, and green cherry is easier to carve than dry. I chose a cherry tree with a large crown that was shading out a cluster of immature maples; this made the tree a viable candidate for removal as part of ongoing timber stand improvement. To ensure the wood remained green, after I felled the tree with my chainsaw, I placed the log I would use for the bowl in a shady spot and sealed the end grain with a commercial end grain sealer. See image 1. Alternatively, I could have used latex paint immediately after cutting. Either substance prevents a log from drying and cracking, thereby preserving it in good carving condition. Of course, the tree provided more wood than I needed for my bowl; I gave some of the wood to other bowl makers, and I saved a large section from which I plan to make a table.
The next step in the process was to cut a blank from the log and to split it with a sledgehammer and wedges. Because I wanted to preserve about half of the log round, I planned my split accordingly. I used wedges to accomplish this, although a more specialized tool for this is called a froe, which is used to score the wood before splitting. I planned for the bowl’s bottom to be on the bark side and the inside of the bowl on the wood interior, pith side. (This is a common practice, although it is possible to carve a bowl with the pith side as the bottom and the bark side as the interior; this is referred to as an “upside down bowl.”)
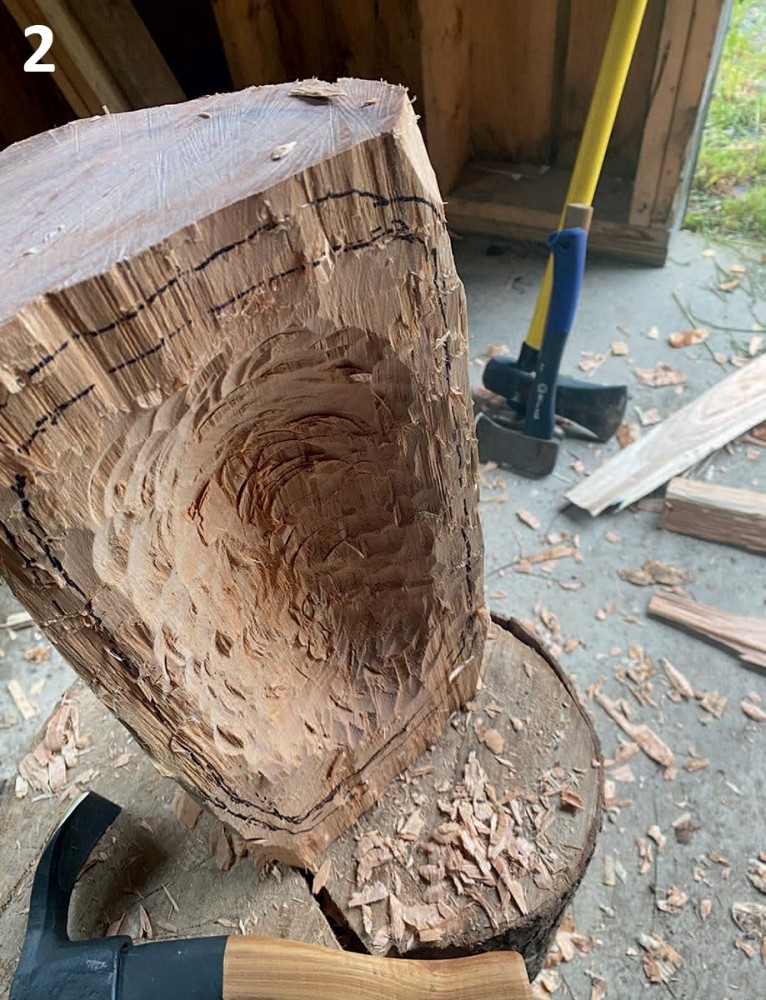
After creating my blank, I removed the bark and as much of the pith as I could. Both of these steps helped the wood I would shape into my bowl dry evenly and avoid cracking. I easily removed the cherry’s bark with an axe. To remove the pith, I used a hollowing adze. During this process, I continued to think about the size and layout of my bowl. As seen in image 2, I used a marker to create a rough outline of the bowl, which helped guide my process. I used an axe to create the flat bottom surface of my bowl.
In this step of bowl carving, the goal is to create the rough shape of the bowl, instead of refining it. I removed about 80 percent from the blank while the wood was green, then allowed it to dry before undertaking the finish work.
This carving process creates an abundance of wood chips, which I saved and placed in a garbage bag; when I was not working on the bowl, I stored it in the bag, surrounded by the chips to help it dry gradually and evenly. As I began the more intricate carving, I also saved the finer shavings for this purpose. I checked the bag daily for excessive moisture buildup and rotated the chips to ensure a slow drying process and to avoid cracking – and taking care to avoid too much moisture, which could cause mildew to grow on the bowl.
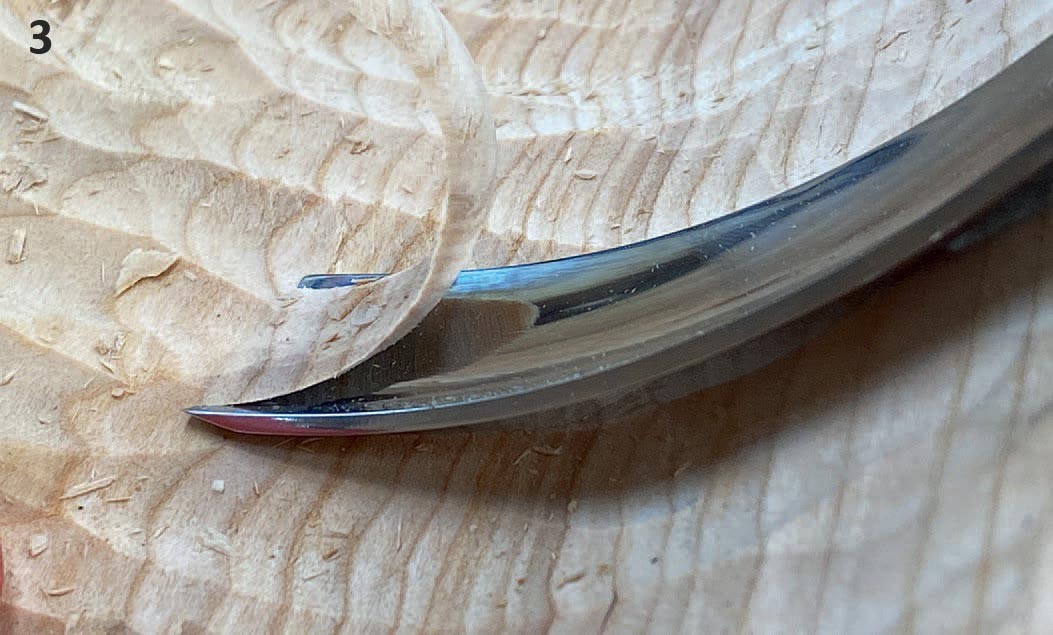
After roughing out both the interior (with the adze and gouge) and exterior (with the axe and drawknife) of my bowl and allowing it to dry for about two weeks, it was time to begin the detail work. For this step, I used a sharp gouge (see image 3), which created beautiful shavings and a very enjoyable carving process.
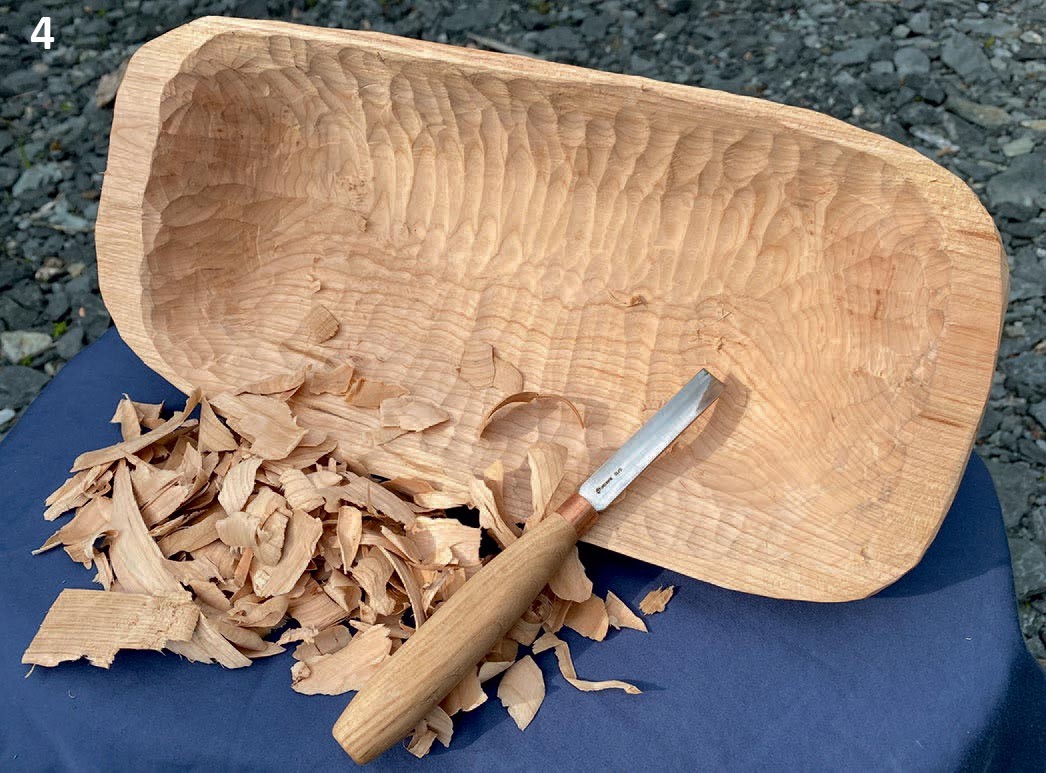
I used a #8 gouge to continue shaping the interior of the bowl. This process left ridges, which I later removed with a shallower #5 gouge, seen in image 4. The outside of the bowl required additional axe and drawknife work to shape and smooth the surface. A gouge could also be used for the outside, depending on a bowl’s design.
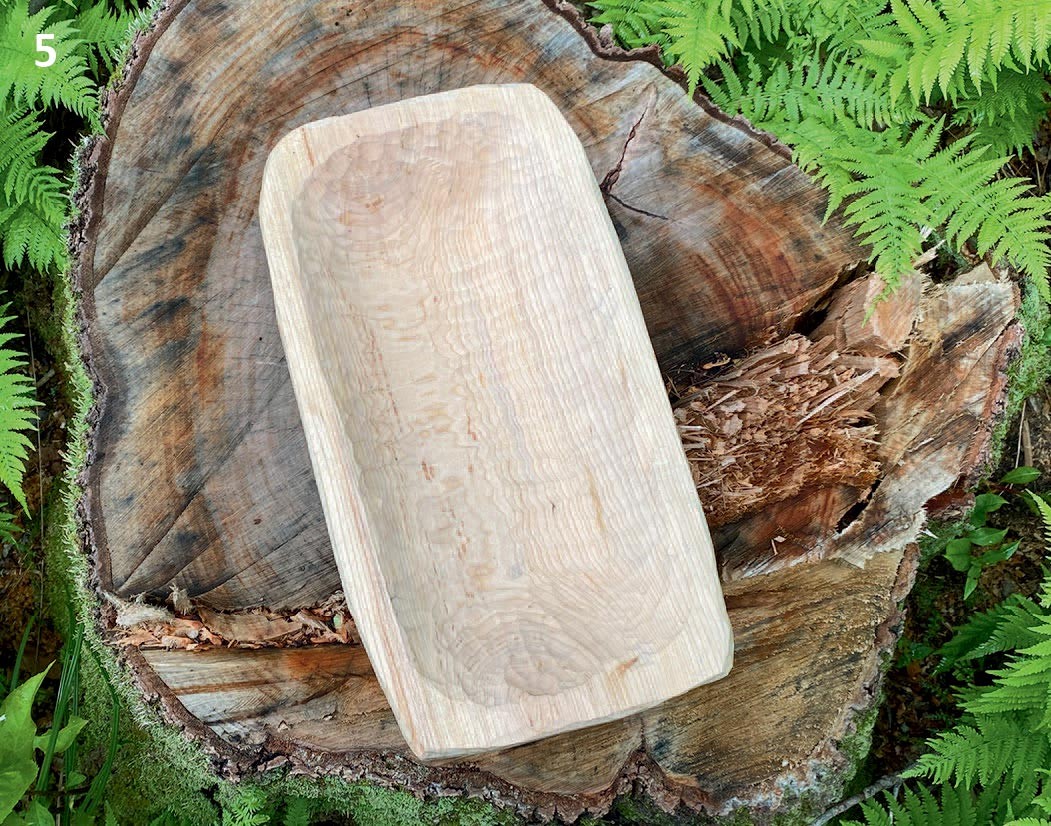
The sides of a carved wooden bowl can be quite thin, but I wanted the rim on the ends to be thicker for handling purposes. In image 5, the sides were still quite thick, and I used a drawknife to whittle them down. In this photograph, the bowl sits on the stump of the tree felled to create the bowl. To secure the bowl, I used clamps on my workbench, which allowed me to work on the bowl comfortably while not damaging it.
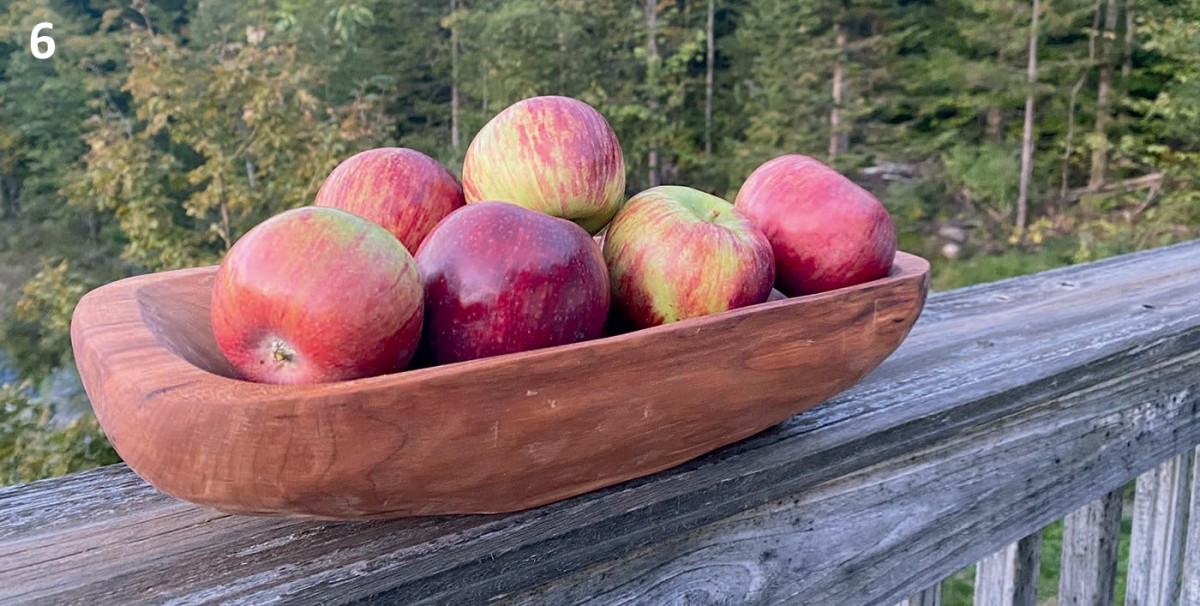
Smoothing out the remaining ridges on the interior of my bowl was time intensive, but ultimately shortened the time I had to spend sanding. Once the bowl was dry, I started with 80 grit sandpaper and worked up to 220 grit. After I finished sanding, I soaked the bowl in mineral oil for a few days to finish it. Although it’s called a dough bowl, I use the finished bowl to hold fruit, as seen in image 6.
I used to think making spoons and bowls by hand was a step backward; the speed and efficiency of modern power tools made this practice seem inefficient. But creating my first dough bowl made me realize that this process is not actually a step back; objects created by hand must accommodate the growth patterns and shape of wood in a manner that a modern power tool can’t provide. Now, when I walk in the woods or am splitting firewood, I visualize practical objects superimposed on trees and their branches: spoons, bowls, furniture – waiting to be sculpted by sharp steel held in our hands.
Discussion *